
Build Your Own Palworld Server, Part 3: A Browser Admin Page With Zero-Dependency Node
Published 2026-07-13 · SameOS Tools
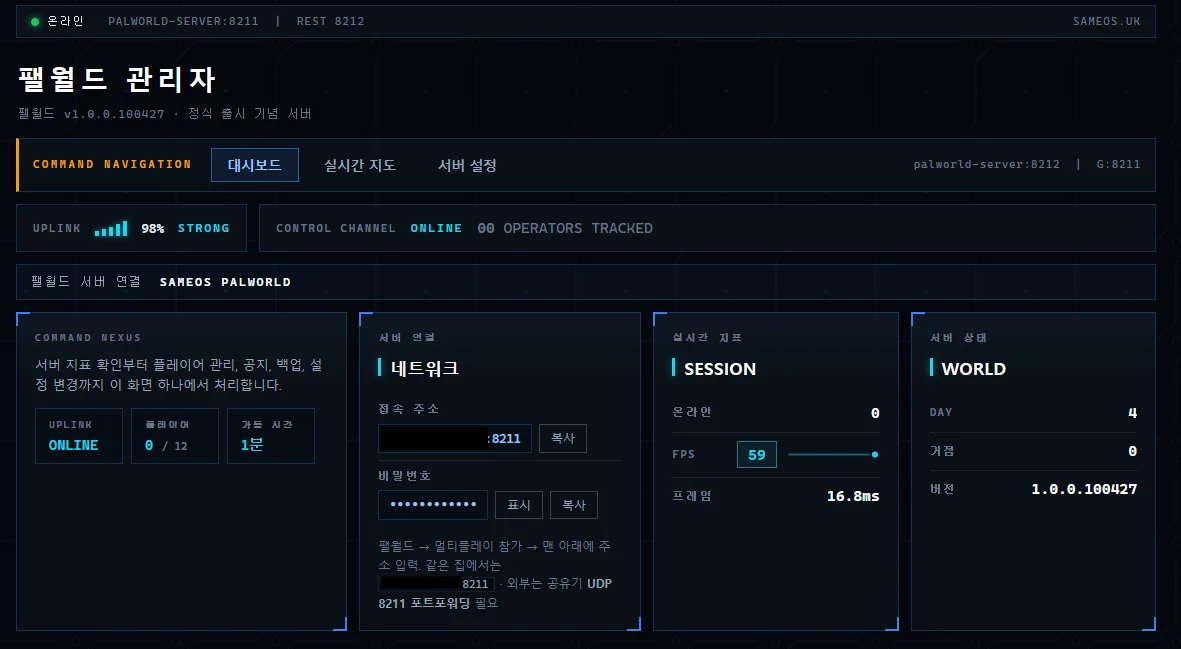
Parts 1 and 2 covered opening the server and running it safely. Still, logging in over SSH (the terminal connection used to type commands on a remote server) for every save or restart gets old, and the existing admin tools never quite fit my setup. So I built my own admin page: buttons in the browser, powered by nothing but Node (a program that runs JavaScript on a server) built-ins - zero external packages to install.
Architecture - the Password Never Leaves the Server
The structure is three hops: browser → relay server (proxy) → the Palworld REST API. If the browser calls the REST API directly, the admin password ends up stored in the browser - and I learned first-hand why that is bad. My first version kept the password in the browser; when I changed it on the server, every open browser kept retrying with the stale password, flooding the logs and even making the server stutter. Now the password exists only in a config file on the server, and the browser just presses the buttons the relay exposes.
There is no login screen at all. Instead, the admin page listens only on 127.0.0.1 (the address that means "this machine itself"), which makes it unreachable from outside. To manage the server, open an SSH tunnel (a private passage between your PC and the server: ssh -L 8280:127.0.0.1:8280 user@server) and browse http://127.0.0.1:8280. If you ever want it on a domain, put a proven authentication service (a gatekeeper that lets only people you allow log in) in front first. That said, this page can stop the server and change its settings, so it is safest kept to the server owner alone - friends only ever connect through the game.
The Basics - Status, Announce, Save, Shutdown
The Palworld REST API offers server info (/info), the player list (/players), announcements (/announce), saving (/save), and shutdown (/shutdown). The admin page starts as buttons over these. The shutdown button in particular should bundle announce → save → shutdown in one action, because of the "stops without saving" problem covered in part 2. A status card fetches server info every few seconds to show who is online.
// server.js - run with: node server.js (in the server terminal), zero packages
const http = require('http');
const { execFile } = require('child_process');

const REST = 'http://127.0.0.1:8212/v1/api';
// The password lives only in a server env variable - never sent to the browser
const AUTH = 'Basic ' + Buffer.from('admin:' + process.env.PAL_ADMIN_PASSWORD).toString('base64');

async function rest(path, method = 'GET', body) {
    const res = await fetch(REST + path, {
        method,
        headers: { Authorization: AUTH, 'Content-Type': 'application/json' },
        body: body ? JSON.stringify(body) : undefined,
    });
    if (!res.ok) throw new Error('REST ' + res.status);
    return res.json().catch(() => ({}));   // shutdown etc. return an empty body
}

http.createServer(async (req, res) => {
    res.setHeader('Content-Type', 'application/json; charset=utf-8');
    try {
        if (req.url === '/api/status') {           // for the status card
            const [info, players] = await Promise.all([rest('/info'), rest('/players')]);
            return res.end(JSON.stringify({ info, players: players.players }));
        }
        if (req.url === '/api/stop' && req.method === 'POST') {   // safe shutdown bundle
            await rest('/announce', 'POST', { message: 'Server shutting down in 30s' });
            await rest('/save', 'POST');
            await rest('/shutdown', 'POST', { waittime: 30, message: 'Shutting down' });
            return res.end('{"ok":true}');
        }
        if (req.url === '/api/power-on' && req.method === 'POST') {  // a stopped server has no REST
            execFile('docker', ['start', 'palworld']);
            return res.end('{"ok":true}');
        }
        // remaining buttons and the HTML/JS page follow the same pattern
        res.statusCode = 404; res.end('{}');
    } catch (e) {
        res.statusCode = 502; res.end(JSON.stringify({ error: String(e) }));
    }
}).listen(8280, '127.0.0.1');   // localhost-only - this one line replaces authentication
Paste It and Run
Here is the exact sequence to save and run the code. The Node that apt installs on Ubuntu is too old for this code (it needs 18+), so register the official repository first. Once it runs, connect through the SSH tunnel described earlier in this part.
# 1) install Node 18+ (Ubuntu/Debian)
curl -fsSL https://deb.nodesource.com/setup_22.x | sudo -E bash -
sudo apt install -y nodejs
node --version       # v22.x means success

# 2) save the code and run it (in the working folder from part 1)
cd ~/palworld
nano server.js       # paste the code above → Ctrl+O, Enter, Ctrl+X
export $(grep -v '^#' .env | xargs)
PAL_ADMIN_PASSWORD="$ADMIN_PASSWORD" node server.js

# 3) on your own PC - open the SSH tunnel and browse
ssh -L 8280:127.0.0.1:8280 user@server-address
# keep it open and visit http://127.0.0.1:8280 in the browser
That is the foundation: saving and stopping are now one button instead of terminal commands. Part 4 adds what REST alone cannot do - settings editing and power on/off - plus the two features that turned out to be the most fun: a server console and a live map.